
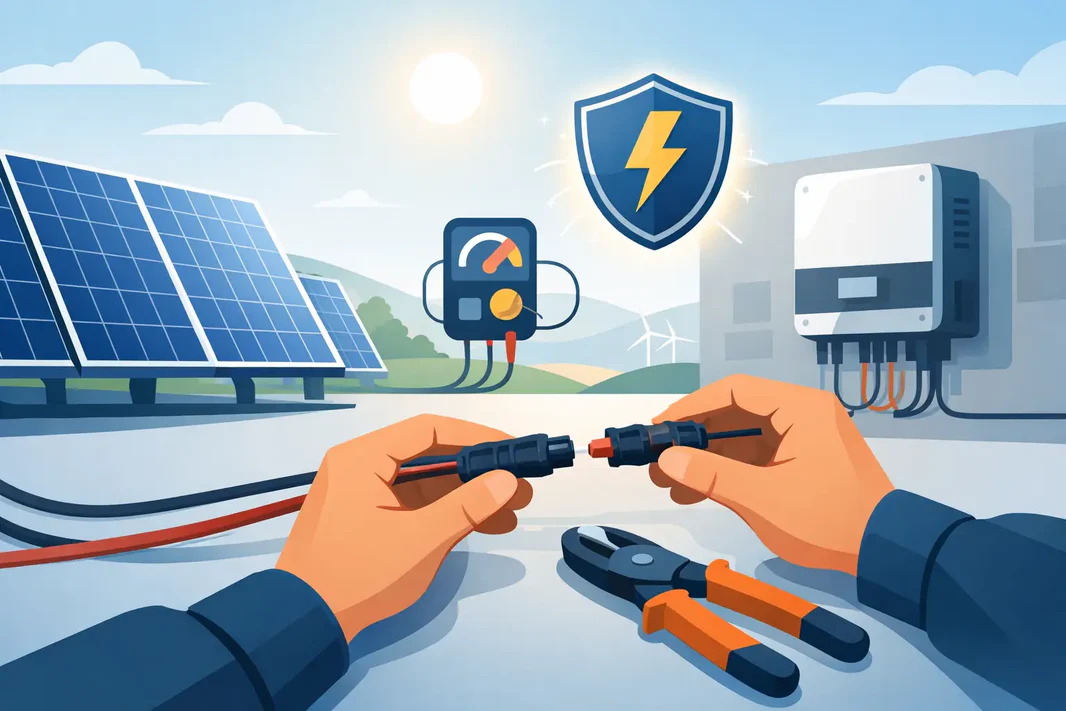
A solar setup can look simple until you’re holding MC4 connectors in one hand, a charge controller manual in the other, and wondering what happens if you wire it wrong. If you’re learning how to connect solar panels, the goal is not just to make power – it’s to build a system that charges correctly, runs safely, and matches the equipment you already own.
That starts with one basic fact: solar panels are not all connected the same way. The right method depends on your battery voltage, your charge controller limits, the panel specs, and whether you’re feeding a portable power station, an RV battery bank, or a more fixed off-grid setup. Get those pieces lined up first, and the actual wiring becomes much more straightforward.
How to connect solar panels the right way
Most small and mid-size systems use one of two wiring methods: series or parallel. In series, you connect the positive lead of one panel to the negative lead of the next. That increases voltage while amperage stays the same. In parallel, you connect positives together and negatives together. That keeps voltage the same while increasing amperage.
Neither method is automatically better. Series wiring is often useful when you need higher input voltage for an MPPT charge controller or want better performance over longer cable runs, since higher voltage generally means lower current and less voltage drop. Parallel wiring is often a better fit when you need to keep panel voltage closer to a 12V system input range or when partial shading is a concern, because one shaded panel can drag down a series string more than a parallel array.
For example, if you have two 100W panels rated around 20V each, wiring them in series gives you roughly 40V. Wiring them in parallel keeps you around 20V, but doubles the current. That difference matters because your charge controller and battery system can only accept so much voltage and current.
Start with the panel and controller specs
Before you connect anything, read the label on each panel and the input limits on your charge controller or solar generator. The numbers that matter most are open-circuit voltage, operating voltage, short-circuit current, and maximum power current. On the controller side, check the maximum PV input voltage and maximum input current or wattage.
This is where many wiring mistakes begin. People assume that if two panels are each listed at 100W, they can combine them any way they want. But if series wiring pushes voltage above the controller’s maximum input, you can damage equipment. If parallel wiring creates more current than the system is designed to handle, you can also run into trouble.
Battery voltage matters too. A 12V battery bank can work with higher-voltage solar input if the charge controller is designed for it, which is common with MPPT controllers. A PWM controller is less flexible and usually works best when panel voltage is more closely matched to the battery system. If you’re charging a portable power station, the manufacturer will usually state the accepted solar input range clearly. Stay inside that range.
Series vs parallel in real-world setups
If you’re wiring solar panels for an RV, van, cabin, or backup battery system, the best configuration usually comes down to equipment compatibility and conditions on site.
Series wiring is often the cleaner choice when your controller supports it and your panels get full, consistent sun. It reduces current on the wire, which can let you use longer cable runs more efficiently. That can be helpful if your panels sit on a roof and your power station or battery bank is mounted farther away.
Parallel wiring makes more sense when shading is likely from trees, vents, AC units, or uneven panel placement. It can also be the safer choice for lower-voltage systems that have tighter solar input limits. The trade-off is that current rises as you add panels, so wire size, connectors, and overcurrent protection become more important.
A mixed approach is also common in larger arrays. You might wire pairs of panels in series, then combine those pairs in parallel. That gives you a balanced voltage and current profile, but it requires more planning and proper combiner protection.
What you need before making connections
The actual hardware depends on the system, but most solar panel connections involve the same core components: compatible panels, solar extension cable, MC4 connectors or branch connectors, a charge controller if your battery setup requires one, and appropriately sized fuses or breakers. If you’re charging a solar-ready power station, you may also need an adapter cable specific to that input port.
Use properly rated solar cable, not whatever wire is available in the garage. Outdoor UV exposure, heat, and current load all matter here. The same goes for connectors. MC4-style connectors are common because they’re weather-resistant and designed for solar use, but they need to be matched and crimped correctly if you’re building custom leads.
If your setup includes batteries, install overcurrent protection where required and follow the controller manufacturer’s sequence for connection. Many controllers should be connected to the battery first, then to the solar array. That allows the controller to detect system voltage correctly before solar input is introduced.
How to make the connections safely
The safest way to connect solar panels is to build the system in stages and verify each step with a multimeter. Don’t rely on wire color alone, and don’t assume a connector is dead just because it’s not plugged in. Solar panels produce voltage whenever they’re exposed to light.
For a series connection, plug the positive MC4 connector from one panel into the negative connector of the next panel. The two remaining free leads become the output to your charge controller or solar input adapter. Check the combined voltage before making the final connection.
For a parallel connection, use branch connectors or a proper combiner arrangement to join all positive leads together and all negative leads together. Then route the combined output to the controller. In this setup, verify that the current potential does not exceed the connector, wire, or controller rating.
Once the panel side is ready, connect the output to the solar input side of the charge controller. If batteries are part of the system, connect the controller to the battery according to the manufacturer’s instructions. Then confirm the controller is charging as expected.
If you’re working with a portable power station, the process is usually simpler because the charge controller is built in. You still need to stay within the allowed solar voltage and wattage range. Too little input simply charges slowly. Too much can shut the unit down or damage the input stage.
Common mistakes that cause problems
The biggest mistake is ignoring voltage limits. Cold weather can raise panel voltage above the rated open-circuit value shown under standard test conditions, so leave a safety margin. A setup that looks acceptable on paper in mild weather can overshoot controller limits on a cold morning.
The second common mistake is mixing unmatched panels. Panels with different wattages, voltages, or current ratings can work together in some cases, but performance usually suffers. In series, current is limited by the weakest panel. In parallel, voltage mismatch creates its own inefficiencies. Matching panels keeps charging more predictable.
Undersized wire is another issue. If the wire gauge is too small for the current and run length, you lose charging efficiency and add heat. Poor crimps, loose adapters, and low-quality connectors can also create resistance and intermittent charging problems that are frustrating to trace.
Finally, some buyers skip system expansion planning. If you think you may add panels later, choose a charge controller and wiring layout with headroom now. Rebuilding the system later usually costs more than sizing it correctly the first time.
When to choose a kit instead of building from scratch
If you want fewer compatibility questions, a matched solar kit can save time. That’s especially true for first-time buyers who need a practical backup charging solution for outages, camping, RV use, or light off-grid power. A kit usually pairs panel output with the right controller, cables, and connectors, which cuts down on guesswork.
That doesn’t mean every kit is identical. Some are built for portable power stations, while others are meant for permanent battery charging. Some prioritize portability and folding panels, while others are better for mounting and daily production. The best choice depends on whether your priority is emergency backup, mobility, or a more fixed energy setup.
If you’re comparing options, GenVault carries solar-ready power solutions that fit both portable and backup-focused use cases, which can make it easier to match panels, storage, and accessories without piecing everything together blindly.
Know when to stop and double-check
Solar wiring is approachable, but it’s not a place for guessing. If your controller specs are unclear, your panel numbers don’t match, or you’re building beyond a basic portable setup, take the time to verify the design before making live connections. A few extra minutes with spec sheets and a meter can prevent expensive mistakes.
The best solar system is not the one with the most panels. It’s the one that charges reliably, fits your equipment, and gives you confidence when the grid is down or the campsite is a long way from the nearest outlet.
